Tutorial - How to stencil print gift cards

stencil printed christmas beetle cards

A thorough step-by-step description
of how I print stencil art gift cards


People appreciate it when you hand make cards to give out for birthdays and Christmas time, but there just aren't enough hours in the day to make personalised cards for everybody. So as a happy compromise I hand print cards in batches.

Stencil art is simple, fun, inexpensive, and creates unique art with a lovely hand crafted finished result, so is a great print method to use for making cards. There are three parts to the process: making the stencil, preparing materials and surface for printing cards and printing the cards.

*WARNING* stencil art is addictive! Once you start painting it's hard to know when to stop. You might just start stencil painting every available surface at hand - wrapping paper, walls, pets, vehicles, family members, and so on.

What you will need to design and cut out a stencil
  • a pencil
  • paper to sketch on
  • a design concept! - a star, a fish, a face, what-ever takes your fancy.
  • some 'ezy cut stencil paper' and a ball point pen or acetate and a fine permanent marker
  • a sharp craft knife or good scissors
  • cutting mat

What you will need to print the stencil design onto gift cards
  • your beautifully cut out stencil design
  • nice thick card to print the design onto
  • paint - acrylic dries quickly, which is good
  • some water
  • a sponge or rag to paint with
  • a bench or table surface to print upon
  • old news paper or large sheets of waste paper to protect the bench or table
  • paper towel to keep things clean
  • somewhere safe the cards can sit undisturbed while the paint dries
  • envelopes for your cards

Designing and cutting out the stencil

Use the pencil and paper to sketch your design. It can be anything you like - a star, a word, a flower, a fish, a robot, a face, what ever you like. For my cards I designed a Christmas beetle, as it's a little seasonal without being religious or tacky.

christmas beetle sketch

Important!  Make sure you don't design any 'islands'. For instance, if you are cutting out a stencil of the letter 'A' you can't cut out the entire outside shape and then leave the middle bit of the 'A' remaining, as the middle bit will just drop out. That's an island folks! Instead, join the centre shape to the outside shape with bridges. The same applies to all stencil images, not just letters. Have a go, you will see what I mean.


When you are happy with your design, trace it onto some ezy cut stencil paper with a ball point pen (or onto acetate with a permanent marker). Trace using a lightbox, or tape the design onto a window and use the outside light to trace. You want your stencil paper to be bigger than the card you are printing on to, so you don't get paint on your card where you don't want it.

Now with your stencil paper on the cutting mat, slowly and carefully cut following your traced design, turning the stencil paper around as you go to make the cutting easier. Be sure to cut the corners cleanly, don't just wrench out the almost-cut shape.


A simple shape will take only a couple of minutes to cut out, a complex one can take an hours - seriously!

So now you have your beautiful shape cut out of stencil paper (or acetate) and are ready to start printing.


Preparing to print your stencil design

There are a few things to prepare before you start printing.

Make sure you have your cards ready to print on. A5 sheets of thick paper work well as they fold in half to make A6 cards, a common size easy to find envelopes for (use C6 envelopes). To make the folding bit neater and easier I 'score' or put a crease in the cards where they should fold by running the edge of a tea spoon firmly along the edge of a ruler.

Put down some newspaper or scrap paper to protect the bench/table surface you will be working on.

If you want the print to be in exactly the same place on each card you need to draw a placement guide on scrap paper to help you position your card and stencil during the printing process. The technical term for this is print registration. On top of a large sheet of scrap paper, line up your stencil design on one of the cards exactly where you think it should go. Trace around the edges of the card and then the edges of the stencil paper. You will now have two overlapping rectangles drawn on your scrap paper. Use this as a guide and every print will be in the same place.

Put a big glob of paint on a palette. For paint I use acrylic, as it dries quickly. Fabric paint works well too and comes in sparkly colours! For a palette I use a plate covered with tin foil, making it easy to clean up when you are finished.

Dampen your sponge with water so it is soft and malleable, but squeeze out as much of the water as possible. You don't want the water in the sponge watering your paint down as it will run under the stencil paper when printing.

Put your first sheet of card in place, and lay the stencil design over the top. Get it all lined up to print.


Put a swipe of paint on your sponge and dabble it up and down a few times elsewhere on the palette, to spread the paint evenly on the sponge surface.

Printing your stencil design

Let the fun begin! Hold down the stencil design onto the card surface with one hand and, using the sponge in a rocking, padding motion, apply the paint through the stencil and onto the card. Don't push down on the sponge too hard as it will push paint under the edges of the cut stencil shape, creating nasty blobs where you don't want them - just pat the paint on. You will get the hang of this.


When you have filled the cut out area of the stencil design with sponged-on paint, put the sponge aside and gently peel off the stencil paper. There you go, your first print! Now simply repeat until all your cards are done.


During the printing process use the paper towel to keep at least one hand clean of paint, so you can handle printed cards, transferring them to your drying space without finger-pints. I use a clothes drying rack to peg my prints up - keeps them neatly in a small space and out of the way. If using acrylic paint your prints will probably only need about a day to dry.

Once the printed cards are dry remember to photograph your efforts! Photographs of repeating printed artworks always look cool.


Now you only have to fold the cards, write in them (the hardest part of the process) and post them to friends and family - who will all be utterly delighted to receive them.

hand printed christmas beetle card

As you can see I made two-colour cards. This meant I had to print one colour onto all the cards, let them dry and then print the next colour over the top and allow them to dry again. So setting up print registration and allowing lots of drying time was important.

I also used multiple paint colours on the sponge at the same time, allowing the paint to mix on the actual surface of the print - bit arty, eh?!


Remember, this is just how I do it. Have a go, play and experiment, and see what works for you. 

Feel free to send a card to me!

This has been my very first tutorial, so if you like it or even if you hate it please leave a comment and let me know. Thanks.

R :)

map of the supercontinent Pangaea


"Our world long ago, all the lands joined together
When first appeared beasties of fur and of feather"

This is a map of the world as it may have looked around 240 million years ago in the middle of the Triassic period. Drawn with pen and ink, coloured and textured digitally.

Two massive lands Gondwana and Laurasia had just bumped into each other, creating the Appelation Mountains and forming the supercontinent Pangaea.

Although there are other maps of Pangaea around, I could not find any illustrated in an old world style with monsters roaming the land and seas. So I just had to have a go at making one myself. Yep... nerd. I know.

Please note, I am an artist not a scientist. Although I did a fair bit of research to get it as right as I could, there is still plenty of artistic license. For instance, I made up all the rivers - sorry, I just couldn't find reference which told me where the real ones were. A few of the mountains could well be wrong too. And that volcano in between South America and Africa, well it just looked good there. So to any time travellers out there, this map is not to be used for navigation, it is decoration only!


Meet the beasties...

The animals featured are all carefully based on life that would have been kicking around within ten million years or so of that time. I intentionally didn't label them on the map, as I think leaving the creatures a little vague and generic aids imagination. Further more, when these creatures actually existed they didn't have titles such as Saurisichisan or Amonite, instead they would have thought of each other as 'the scaley thing with big teeth it is better not to go near' or 'the tasty little furred critter' or maybe 'the giant winged one who poos from the sky'.

But for the curious, and for a closer look at all the detail going on, here is a list of what the beasties are meant to represent. (You are allowed to scroll quickly through this bit. I am being a little self indulgent)


Cynodont illustration
Cynodont
Eoraptor

Nothosaur
Stagonolepis


Coelophysis
Placodont


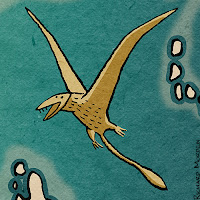
Pterorynchus
Thalattosaur


Rutiodon
Panphagia


Cynognathian
Ichtheosaur


Eudimorphodon
Amonite


Eoraptor
Rauisuchus

Dicynodont
Helicoprion - alas I drew its mouth
swirl upside down. Whoops!


Temnospondyl


The Triassic plants featured are fern trees, ferns, conifers, giant club mosses, quillworts and cycads.

As you can see this artwork has an extraordinary amount of texture and detail. It is designed to look its best when printed at poster sizes. It would be ideal educational artwork for a classroom or decoration for a kids room.

R :)

Illustration Friday - stripes

broadclub cuttlefish animated gif

I saw a great documentary on tv called 'Cuttlefish - Kings of Camouflage'.

One of the cuttlefish featured in the documentary was a Broadclub Cuttlefish which has the remarkable ability to bamboozle its prey with a crazy strobing stripe pattern. Truly bizzare stuff.

If you want to see a real one in action here's a link I found to a clip from the documentary.

Cuttlefish are so cool.

R :)

Christmas Cephalopod card art

Did you know I am selling Christmas cards featuring my artwork online via Redbubble? Buy online and have them delivered straight to you!

Here are a couple of non religious and mostly tasteful designs.

Christmas cephalopod
Cephalopod is a fancy way of saying octopus
  • Discount of 30% on every order of 16+ cards
  • Superior writing surface for your words of wisdom
  • 300gsm card with a satin finish
  • Greeting cards supplied with envelopes and optional cellophane sleeves, ideal for reselling
  • Standard Greeting Card - 100 x 150mm / 4” x 6”
  • Large Greeting Card - 125 x 190 mm / 5” x 7.5”
  • Postcard - 100 x 150mm / 4” x 6”


If you have recieved a Christmas card from me sometime in the last few years these design may well look familiar...

R :)

Window Frames - art along Sydney Road

Sydney Road shopping guide cover illustration

Sydney Road Brunswick has been turned into an art gallery for a couple of weeks.

If you happen to be wandering along Melbourne's greatest shopping strip in between Albert Street and Brunswick Road have a squiz in the shop windows and you will find an assortment of art works. This is the Window Frames exhibition organised by the Sydney Road Brunswick Association.

I have a piece in Mocca Gigi's window, 165 Sydney road - a reinterpretation of the cover art I did for the Shopping and Visitors  Guide to Sydney Road, Brunswick. As it is presented in the window as an artwork I had to write an artist's statement to be displayed with it. First time I've ever had to do one of those!

'An illustrated response to a commercial brief, intended to appeal to an aesthetically literate Brunswick audience. Hand inked line-work, and confident, optimistic colours combine with the guide's tattoo iconography to present an adventurous visual experience.

Like a modern day Hansel and Gretel, a couple embark on a journey of exploration, seeking fashion, food and fun in an enchanted retail environment. Fortunately they won't need to rely on bread crumb trails to find their way home, thanks to the Shopping and Visitors guide they have a map!'

My favourite art works along the road are:
Lights Out by Brendon Taylor - a timber and resin angler fish in the window of Rommelik 141 Sydney Road
and Crochet Fruit by Cherry Collins in the window of Olive Grove 159 Sydney Road.
Both beautiful, fun pieces, and well worth a look.

There are plenty of other very cool artworks, so well done to all the local artists who participated. And a big thanks to all the traders who gave up some window space for us.

The Window Frames exhibition is on until the 31st of October 2011.

R :)


velocirapture

velociraptor holding a bouquet of roses


I drew this for the Illustrators Australia 9x5 exhibition 'rapture', opening this Friday.


Velocirapture was done with 6B pencil and shellac on 9x5 inch plywood. 

She's based on the well known dinosaur 'velociraptor', which would have actually looked a bit like this, with the obvious exceptions of the bunch of flowers and ludicrous expression. 
'What's with all those crazy feathers?' you cry. 'The velociraptors on Jurassic Park didn't have those!'.
Well actually these dinosaurs had bird-like feathers. They would have looked a lot like large birds with sharp teeth and four fast running limbs ending in huge claws. Just imagine Big Bird with pointy teeth. Kinda scary, if you think about it. 

If you can't make it to the exhibition you can see all the other pieces on line here 

Illustration Friday - mesmerising deer-cat


Look into the eyes of the deer-cat. Look deep into its eyes. 

Feel the mesmerising power of the deer-cat. 
The deer-cat wants you to leave a comment. 
You know you will...

This is a scan of a stencil art Christmas card I sent to friends and family. The original had glow in the dark eyes! For this weeks illustration friday theme 'mesmerising' I scanned a print and gave it a slight animated tweak.

Its okay. The deer-cat says you can look away now.

the Shopping and Visitors Guide to Sydney Road, Brunswick

Sydney Road Shopping Guide art


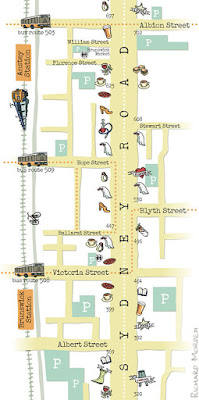
Recently I had the chance to illustrate two maps and a cover for the Shopping and Visitors Guide to Sydney Road, Brunswick.

The cover and maps are designed to be casual, engaging and informative, to deliver a sense of adventure and excitement, and to appeal to the aesthetically literate Brunswick population. For my fellow font geeks out there, the typefaces used are Singapur Heavy (the tattoo typeface) and Urgent Telegram (the typewriter typeface). Both very sweet typefaces.

The guide was published by The Sydney Road Brunswick Association and laid out by Beyond the Page.

If you are living around the Brunswick area you can expect to have a copy delivered along with the Leader paper sometime in the next few weeks.

They say Sydney Road is the best thing ever to have come out of Sydney (that's a Melbourne joke), so here's hoping the guide inspires some exploring adventures of Melbourne's mightiest and most culturally exciting shopping strip!

Cheers
R

Sydney Road Shopping Guide cover illustration
 Sydney Road map art


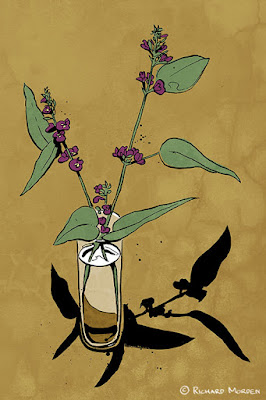
happy wanderer

happy wanderer illustration


I was at a loss with what to draw over the weekend, so I had a look in the garden and discovered the happy wanderer is flowering.
Oh, and here are some dugong sketches too.
R :)


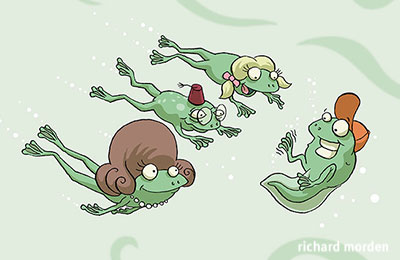
narrative illustrations of a frog with a bouffant

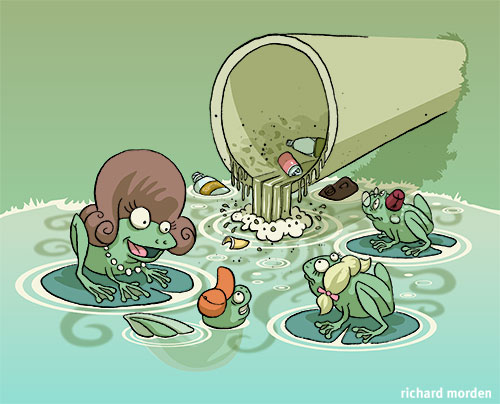
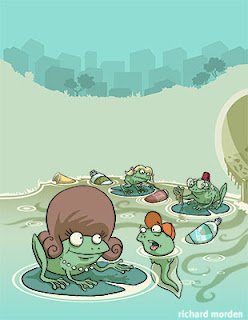
cartoon illustration of frogs in a polluted pond


narrative illustration of a tadpole growing legs

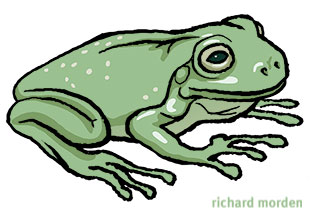
cartoon illustration of a frog with a bouffantillustration of a frog


Narrative illustrations for a class room reader about Billy the frog who is worried the pollution in their pond will inhibit the growth of his legs. Its okay, his legs grow. Phew!


science fiction homages and aardvarks

illustration of Herbert George Wells and his Martian walking machines


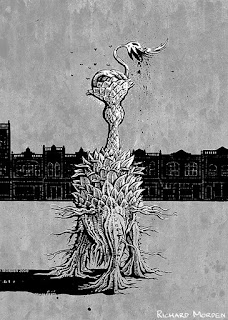
triffid illustrationscience fiction iconography with aardvarks

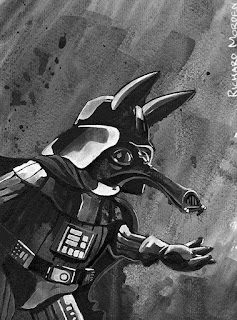
mad max aardvark illustrationaardvark darthvader

As a member of the Melbourne Science Fiction Club I get to use their magnificent library, listen to author talks, and meet other like minded nerdy sci fi types. In return I like to occasionally contribute art for the club magazine.

Here is a collection the cover art I have contributed.

As the club magazine is called Ethel the Aardvark you will note a recurring theme of aardvarks. I don't know why they named the magazine after a Monty Python sketch (Ethel the aardvark goes quantity surveying), but I suppose it's as good a name as any other and it gives me the opportunity to create absurd science fiction homages with aardvarks.

dinosaurs asleep

illustration of sleeping dinosaurs
Dinosaurs asleep!
The dinosaurs in this picture are kind of based on ones that roamed Australia and Antarctica.

Created in response to Illustration Friday theme 'asleep'.